
Repo Management
Repos in Band represent git repositories that you want to manage with coding agent worktrees. Every repo must be a valid git repository. Band does not create or modify your repositories — it simply registers them and manages worktrees within them.
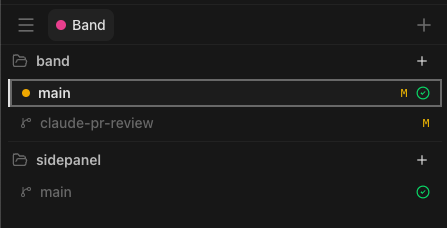
Adding Repos
There are two ways to register a repo with Band:
From the Dashboard UI
Click the + button in the top-right corner of the dashboard toolbar. A dialog will appear where you can select a directory. Band validates that the selected path is a git repository and detects the default branch automatically.
From the CLI
Use the band repos add command to register an existing git repository:
band repos add /path/to/your/repo
band repos add /path/to/your/repo --label my-label
The CLI detects the repository name and default branch. You can optionally assign a label
at registration time using the --label flag.
Removing Repos
Removing a repo from Band unregisters it from the dashboard. It does not delete the repository or any of its files. You can remove a repo by:
- Right-clicking the repo name and selecting Remove from list.
- Using the CLI:
band repos remove <name>
Reordering Repos
Repos in the sidebar can be reordered by drag-and-drop. On desktop, click and drag a repo name up or down to rearrange. On mobile, press and hold a repo until it lifts, then drag it to the new position. The new order is persisted automatically.
Collapsing Repos
Click the chevron next to a repo name to collapse or expand its worktrees. Collapse state is remembered between reloads, so repos you rarely look at can stay tucked away. Label section headers can be collapsed the same way.
Labels and Filtering
Repos can be organized using color-coded labels. Labels are created in the Settings page, and then assigned to repos via the right-click context menu.
- Right-click a repo name to see the Set label submenu.
- Select a label to assign it, or choose None to remove the label.
- Use the label filter dropdown in the toolbar to show only repos with a specific label.
- When labels are defined, repos are visually grouped by label with colored section headers.
You can also drag repos between label groups to reassign labels quickly.
Repo Configuration
Each repo can have a .band/config.json file in its repository root. This
file configures setup and teardown scripts that run during worktree lifecycle events.
{
  "setup": "npm install",
  "teardown": "docker compose down"
}
The setup script runs automatically after a worktree is created. The
teardown script runs before a worktree is removed. Both are non-fatal —
if they fail, the operation continues.
Context Menu
Right-clicking a repo name reveals additional actions:
- Set label — Assign or remove a color-coded label.
- Copy path — Copy the repo's filesystem path to the clipboard.
- Open in Finder — Reveal the repo directory in Finder.
- Remove from list — Unregister the repo from Band.